Files

108 lines
3.8 KiB
Markdown
Raw Permalink Blame History

This file contains invisible Unicode characters
This file contains invisible Unicode characters that are indistinguishable to humans but may be processed differently by a computer. If you think that this is intentional, you can safely ignore this warning. Use the Escape button to reveal them.
This file contains Unicode characters that might be confused with other characters. If you think that this is intentional, you can safely ignore this warning. Use the Escape button to reveal them.
当初安装zabbix时,想着划分50G空间就足够使用了,没想到才一个星期不到根目录就100%沾满了,导致zabbix前端页面无法访问,主要是日志文件太大了,一个日志文件就4~5G,想着就给Ubuntu扩容下
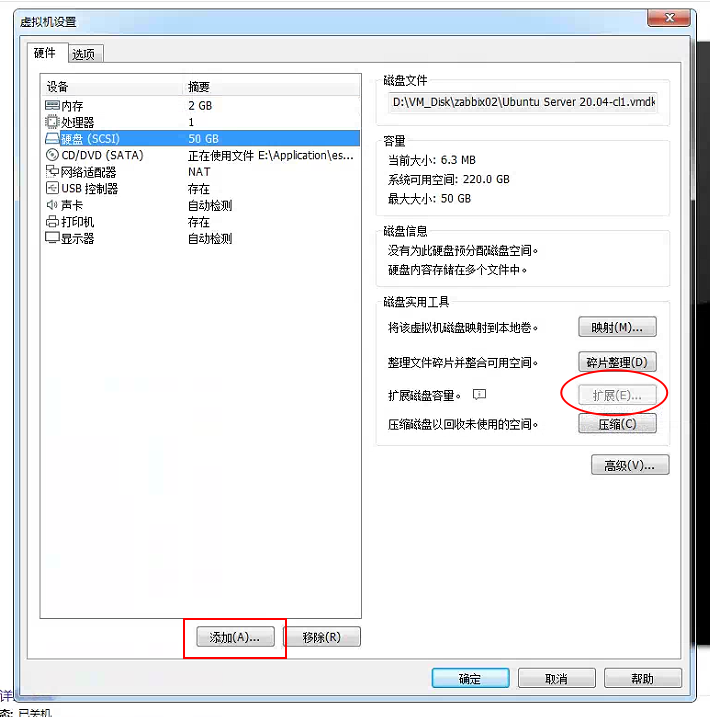
1、vm添加新硬盘,由于我虚拟就中“扩展磁盘容量”是灰色的,所以无法直接进行扩展
![](https://img2024.cnblogs.com/blog/2034475/202403/2034475-20240321215605204-393437321.png)
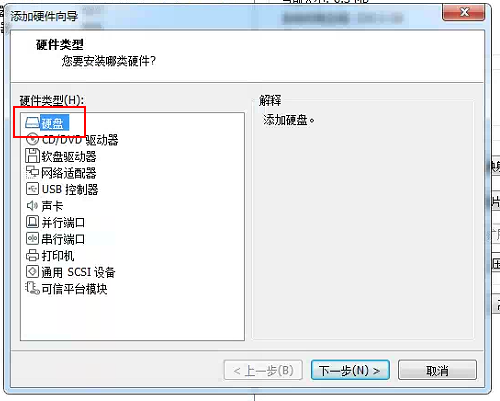
2、添加硬盘
![](https://img2024.cnblogs.com/blog/2034475/202403/2034475-20240321215726989-907739493.png)
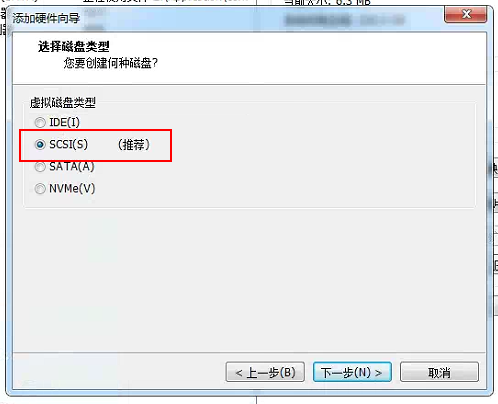
3、硬盘类型“SCSI”
![](https://img2024.cnblogs.com/blog/2034475/202403/2034475-20240321215816945-2026425183.png)
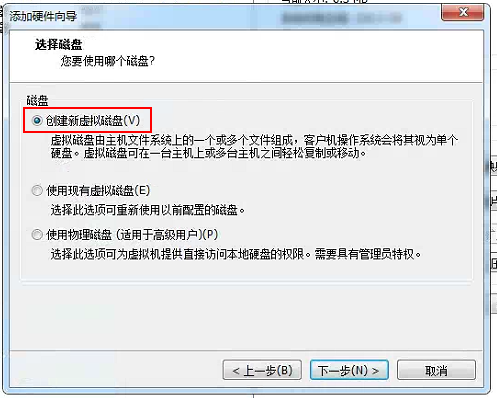
4、创建新的磁盘文件
![](https://img2024.cnblogs.com/blog/2034475/202403/2034475-20240321215901005-453228655.png)
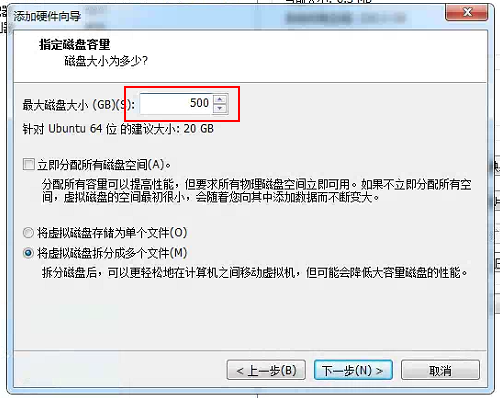
5、分配 500G
![](https://img2024.cnblogs.com/blog/2034475/202403/2034475-20240321215938424-1379571391.png)
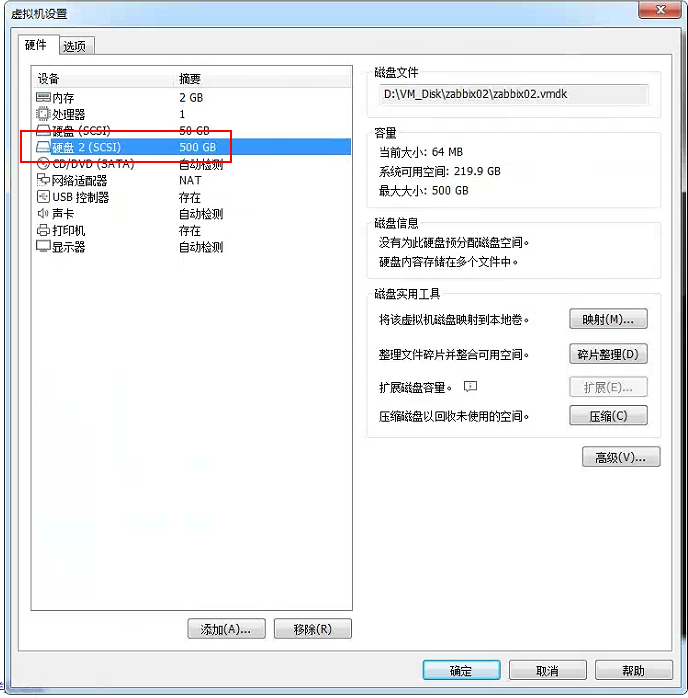
6、硬盘添加完成
![](https://img2024.cnblogs.com/blog/2034475/202403/2034475-20240321220058574-610064568.png)
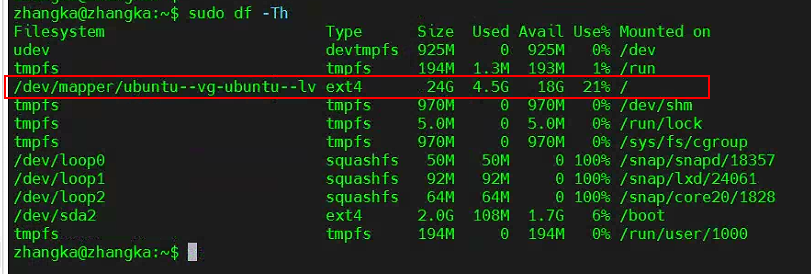
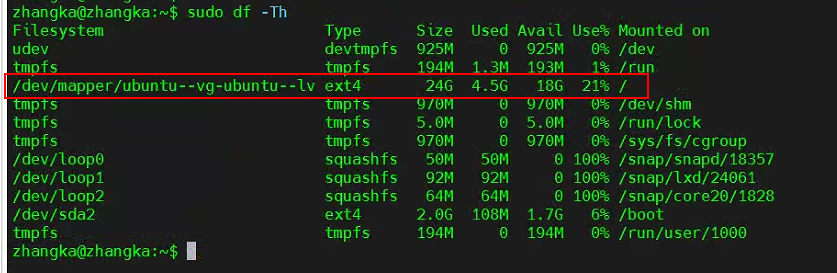
7、根目录没扩容之前的空间,只有24G
![](https://img2024.cnblogs.com/blog/2034475/202403/2034475-20240321221912097-843026039.png)
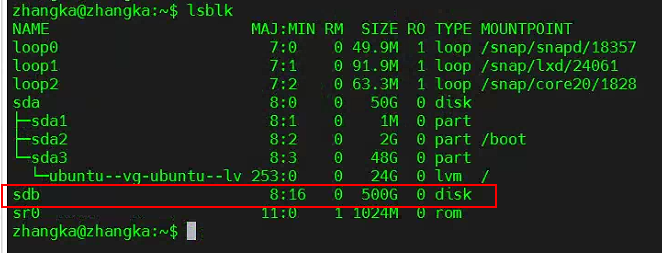
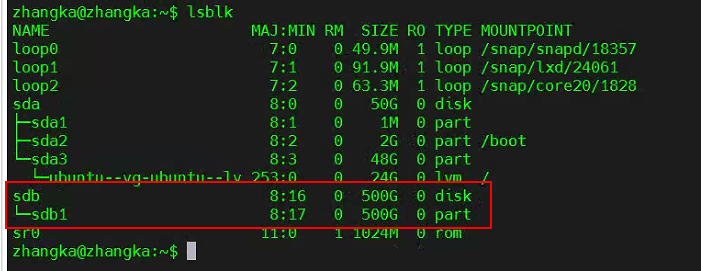
8、使用 lsblk 查看新硬盘是否被系统识别,如果没有识别请重启虚拟机
![](https://img2024.cnblogs.com/blog/2034475/202403/2034475-20240321220706563-1394134656.png)
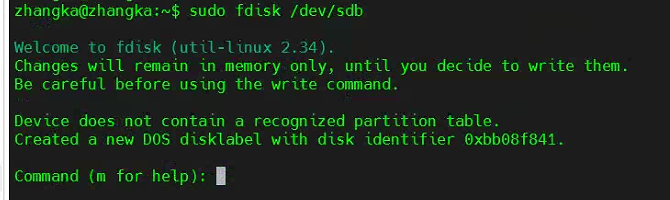
9、对新添加的硬盘进行分区 fdisk /dev/sdb
![](https://img2024.cnblogs.com/blog/2034475/202403/2034475-20240321220943393-901596042.png)
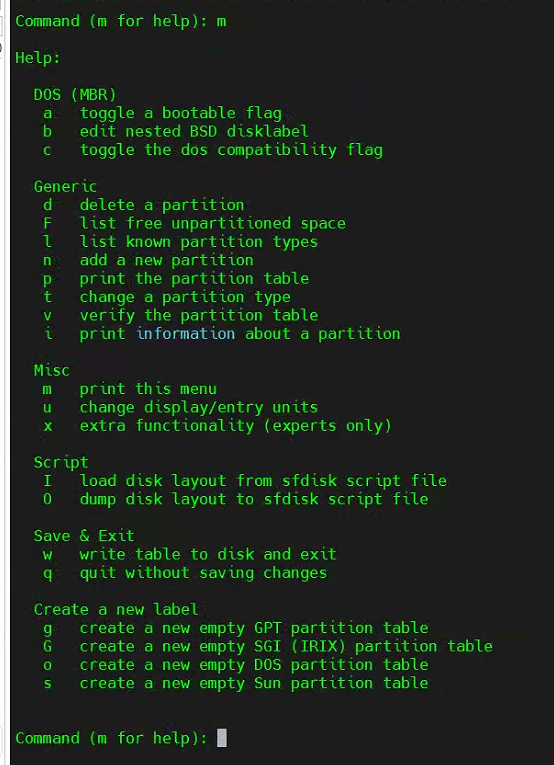
在 command 输入 m 进行帮助
![](https://img2024.cnblogs.com/blog/2034475/202403/2034475-20240321221033405-1823998766.png)
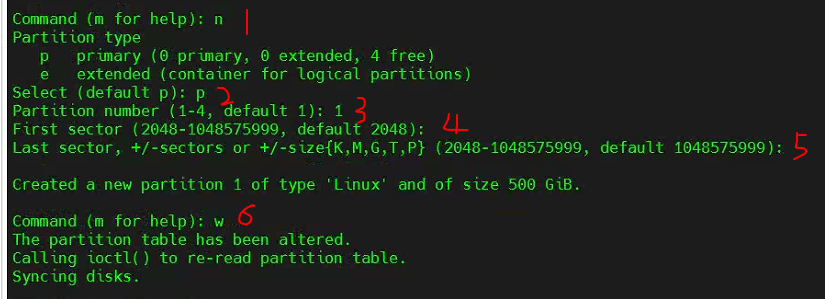
- n           增加一个新分区
- e                扩展分区
- p                主分区
- 1-4             所增加主分区的数量
- 卷的起始位置
- 卷的结束位置
- w          将分区表写入磁盘并退出
第四步、第五步都直接回车确定
![](https://img2024.cnblogs.com/blog/2034475/202403/2034475-20240321221519897-1589389643.png)
10、检查分区,可以看到 sdb1 是刚创建的新分区
![](https://img2024.cnblogs.com/blog/2034475/202403/2034475-20240321221703590-653545489.png)
11、对新分区进行格式化前,先看下之前根目录分区格式,这里是 ext4 分区格式
![](https://img2024.cnblogs.com/blog/2034475/202403/2034475-20240321222213446-810635066.png)
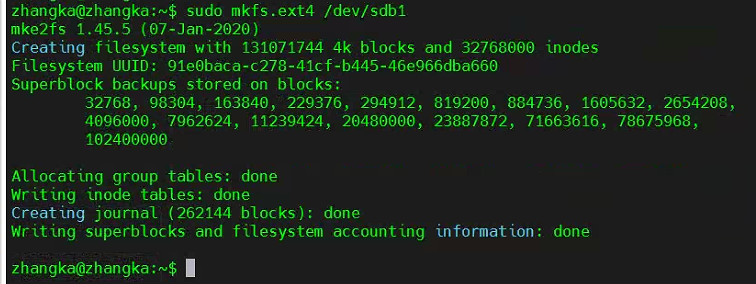
12、命令 sudo mkfs.ext4 /dev/sdb1 ,进行分区
![](https://img2024.cnblogs.com/blog/2034475/202403/2034475-20240321222347344-522582158.png)
13、将硬盘分区初始化为物理卷
![](https://img2024.cnblogs.com/blog/2034475/202403/2034475-20240321222803865-1620638479.png)
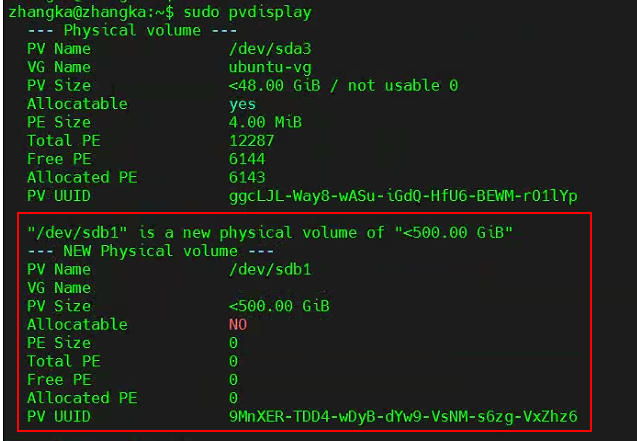
14、查看物理卷,可以看到第二个分区就是我们新创建的物理卷
![](https://img2024.cnblogs.com/blog/2034475/202403/2034475-20240321223104910-457724008.png)
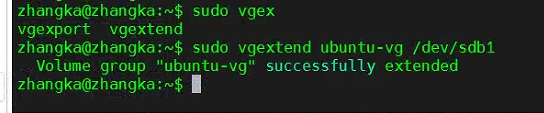
15、vgextend 命令将物理卷添加到根目录所在的卷组
sudo vgextend ubuntu-vg /dev/sdb1
ubuntu-vg #根目录所在的组名
/dev/sdb1 #新磁盘分区名
![](https://img2024.cnblogs.com/blog/2034475/202403/2034475-20240321223340772-318332642.png)
16、根目录逻辑卷扩容
sudo lvextend -L +500G /dev/mapper/ubuntu--vg-ubuntu--lv
-L #指定扩容分区大小
![](https://img2024.cnblogs.com/blog/2034475/202403/2034475-20240321223953672-144413640.png)
17、更新逻辑卷同步至文件系统
xfs文件系统格式用:
xfs_growfs /dev/mapper/ubuntu--vg-ubuntu--lv
其它文件系统格式:
sudo resize2fs /dev/mapper/ubuntu--vg-ubuntu--lv
![](https://img2024.cnblogs.com/blog/2034475/202403/2034475-20240321224437255-2073948179.png)
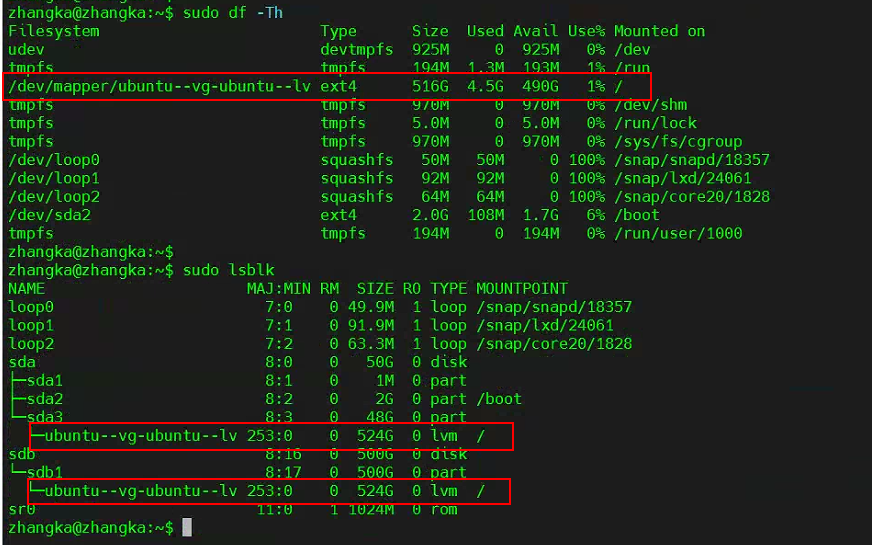
18、升级完成,sudo df -Th 查看分区情况
![](https://img2024.cnblogs.com/blog/2034475/202403/2034475-20240321224700424-1273903931.png)
分类: [9,Linux学习](https://www.cnblogs.com/xiykj/category/1783489.html)